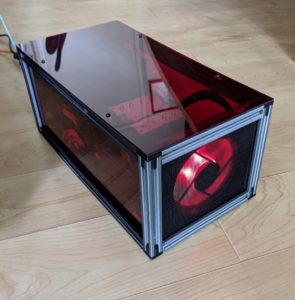
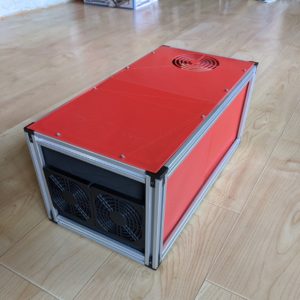
This project is do-it-yourself 3D printable chassis. It is built around standard 2020 frame construction used in DIY 3D printers and CNCs. The design files are available online at Thingaverse, thing:4297391. Note, this is a derivative work, the 2020 beams are based on other designs. The new parts were the brackets and panels. Where possible links to the purchased parts used are included.
All the non-electronic pieces are 3D printable. The largest pieces are the flat panels for the sides, particularly the top and side panels. These can be difficult to print depending the printer volume and tuning settings like leveling. Alternatives would be to use cardboard (not recommended) or acrylic which can be easily ordered online (shown below). The 370mm horizontal beams are too long for most printers and are broken into two pieces. Aluminum versions of the beam are also available online. This build uses a SFX power supply. Two different fan configurations are shown, a single 120mm fan and a dual 80mm fan configuration.
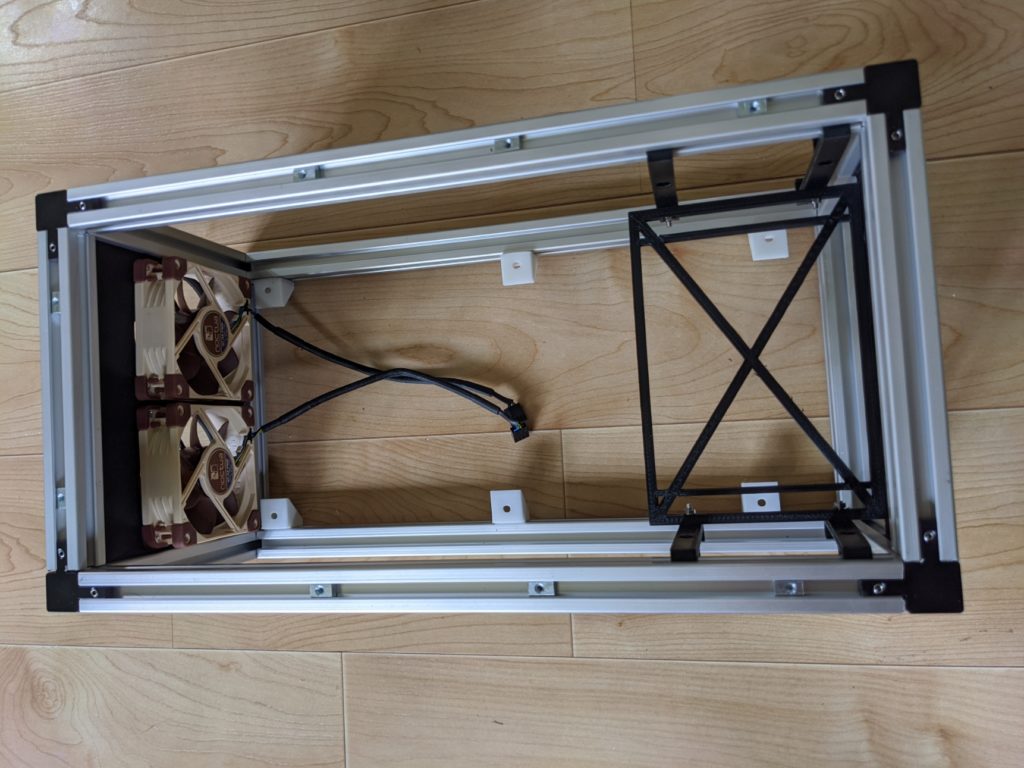
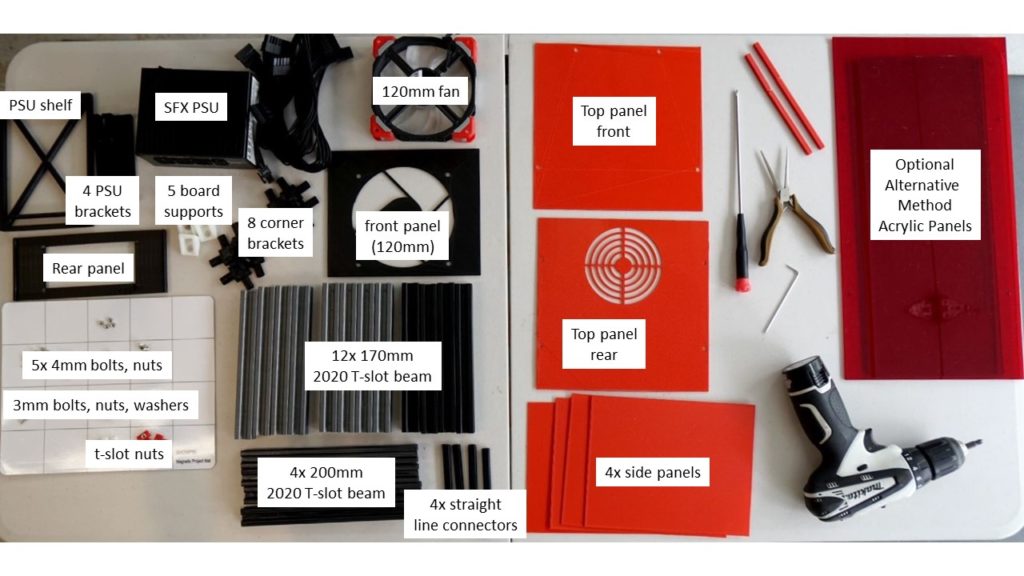
Chassis Bill of Materials
4x 200mm 2020 T-slot beam*
12x 170mm 2020 T-slot beam*
4x 2020 straight line connector*
4x 2020 3-way corner bracket*
5x board support
1x PSU shelf
2x PSU shelf bracket / SSD holder
1x rear face plate*
1x front face plate*
4x side panels (2 pieces per side)*
2x side panel seams*
1x top panel front*
1x top panel rear*
13x t-slot nut*
5x 4mm bolts, nuts
13x 3mm bolts, nuts
Alternative parts available*
4-Pack 2020 Straight Line connector
2x 4-Pack 2020 3-way corner bracket
4-pk 200mm 2020 T-slot beam aluminum., manually cut to 170mm
4-pk 500mm 2020 T-slot beam aluminum, manually cut to 170mm + 370mm
60-pk 2020 M3 T nut
2x Acrylic sheets 380x150x3mm
1x Acrylic sheets 410x210x3mm, w/four holes
also shown with 2x 80mm fan covers
Assembly Instructions Video
Youtube video of chassis build.
World’s First DIY 32-core ARM Tabletop Chassis***
This project was built around MiTAC’s Hawk motherboard which uses Ampere’s eMAG 32-core ARMv8 64-bit processor. This chassis slightly bigger than a shoebox, that includes 2 M.2 NVMe drives, 4 SATA drives (shown with 2.5″ SSDs), upto 8 channels DDR4-2667, half-length x16 PCIe Gen3 slot, integrated 1GbE, BMC, and OCP mezzanaine connector.
Build Parts List
1x MiTAC Hawk motherboard w/Ampere eMAG processor
1x Dynatron R24 active heatsink**
1x Corsair ION SFX 500G power supply
2x Noctua F-A8 PWM 80mm case fans
4x DDR4-2667 16GB DIMMs
1x M2 NVMe boot drive
1x Mellanox MCX341-XCGN 10GbE OPC NIC
1x AMD FirePro W5100 graphics card
Additional area of development
4x 3.5″ solution
PCIe mountng bracket
Rear panel cooling perforation
Wire management system
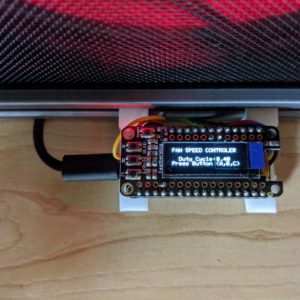
Adaptive fan control
Requiste RGB lighting
Notes
** The Dynatron fans are very noisy. There are a couple techniques to significantly reduce the noise.
1. Use a different cooler, such as Noctua NH-D9DX or NH-U12DX. Both require minor change — use of a 5mm spacer. The U12DX gives the most clearance to the inter row of DIMM. Even at high RPMs the fans in these coolers are pretty quiet.
2. Turn down the fan speed when not in heavy use by accessing the BMC fan speed settings or using an external fan speed controller. Be careful under heavy load not to overheat your CPU.
*** This author worked for Ampere Computing at the time of writing, and is a former long-time employee of Intel Corporation. The opinions expressed in this blog are his own and does not represent those of his current, past or future employers.
